Blog
When Water Strikes: Responding to Disaster
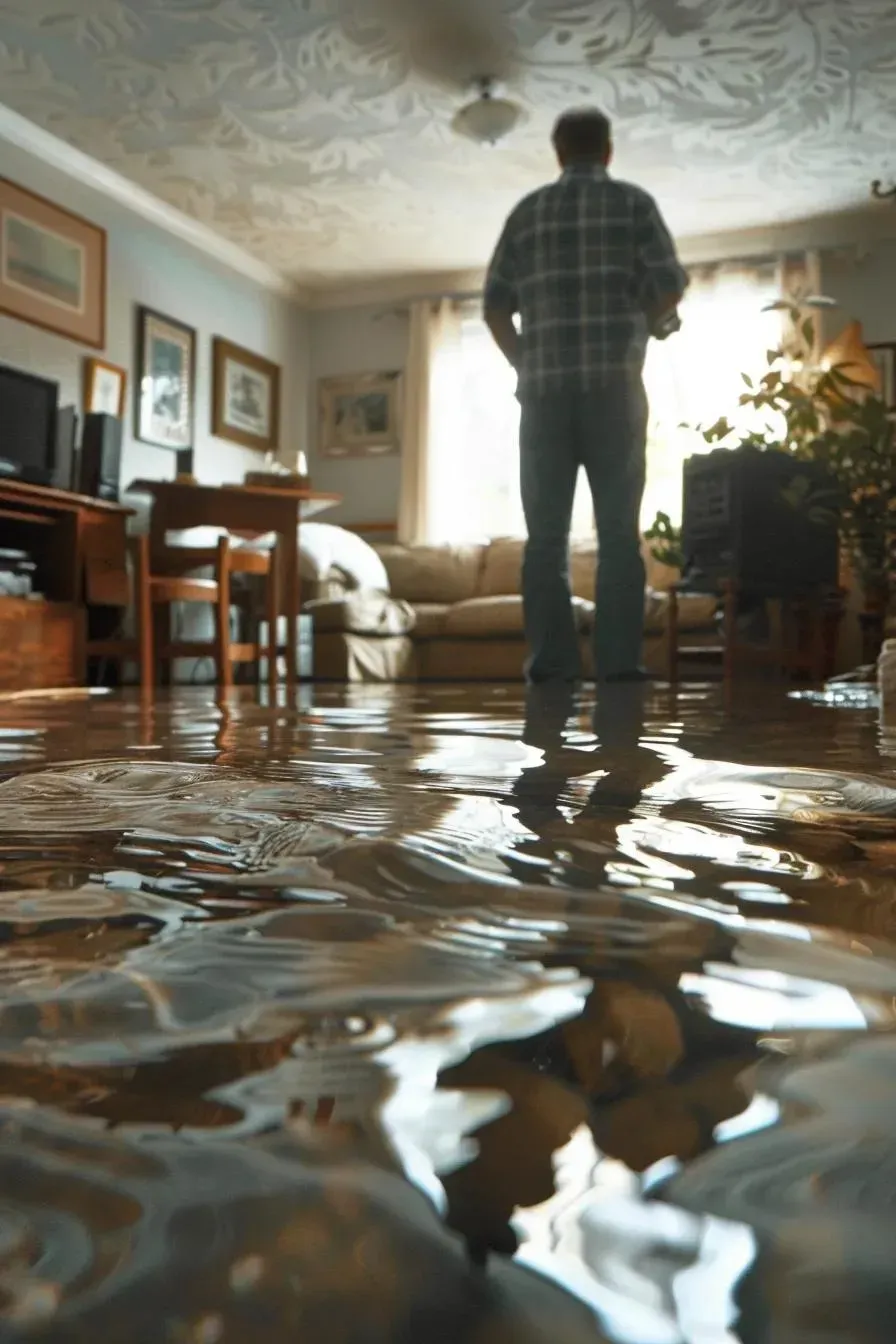
Picture this: You walk into your basement after a heavy Denver rainstorm and find yourself ankle-deep in water. Your heart sinks. I've seen that look of panic hundreds of times, and I'm here to tell you – take a deep breath. There's a clear path forward.
I'm Mike Martinez, owner of Accountable Home Services, and I've guided countless Denver homeowners through the aftermath of everything from burst pipes to flash floods. When water invades your home, you're in a race against time – typically just 24-48 hours before mold begins to take hold, threatening both your home's structure and your family's health.
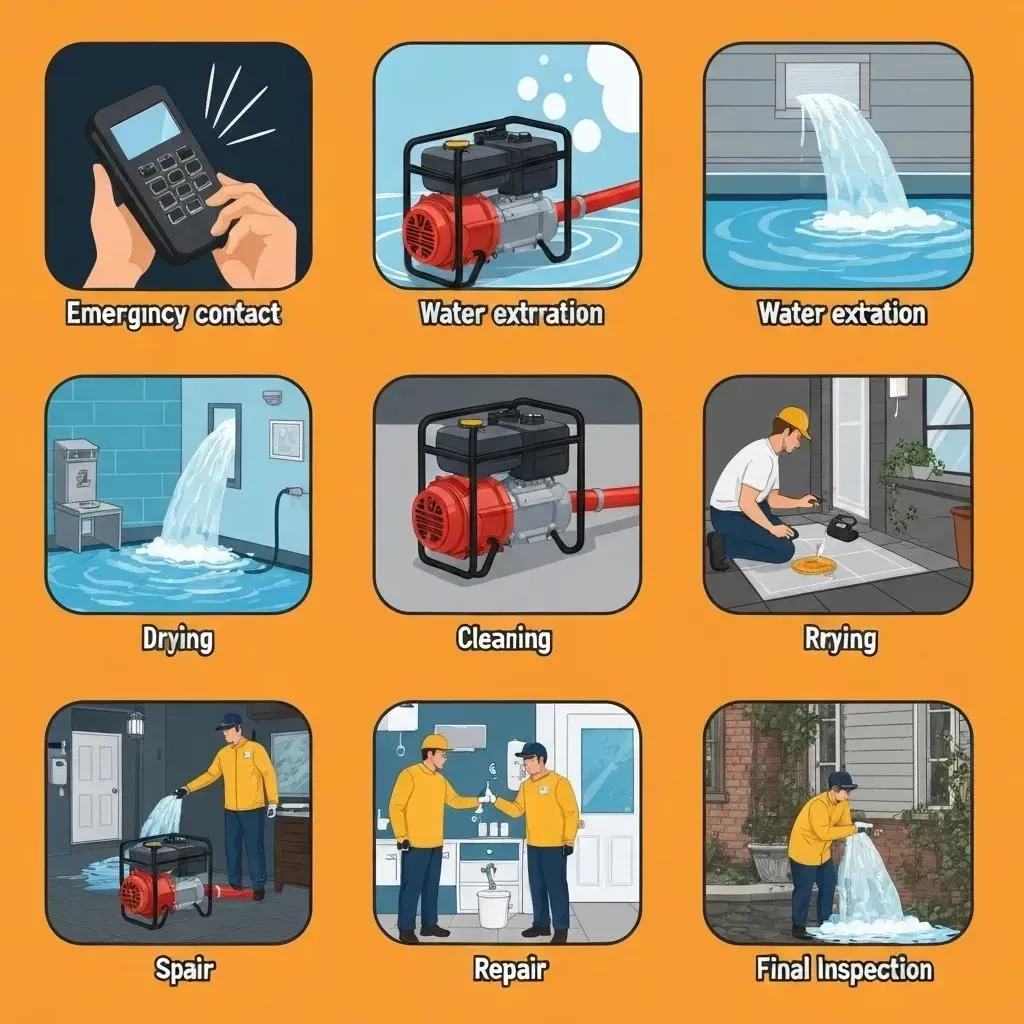
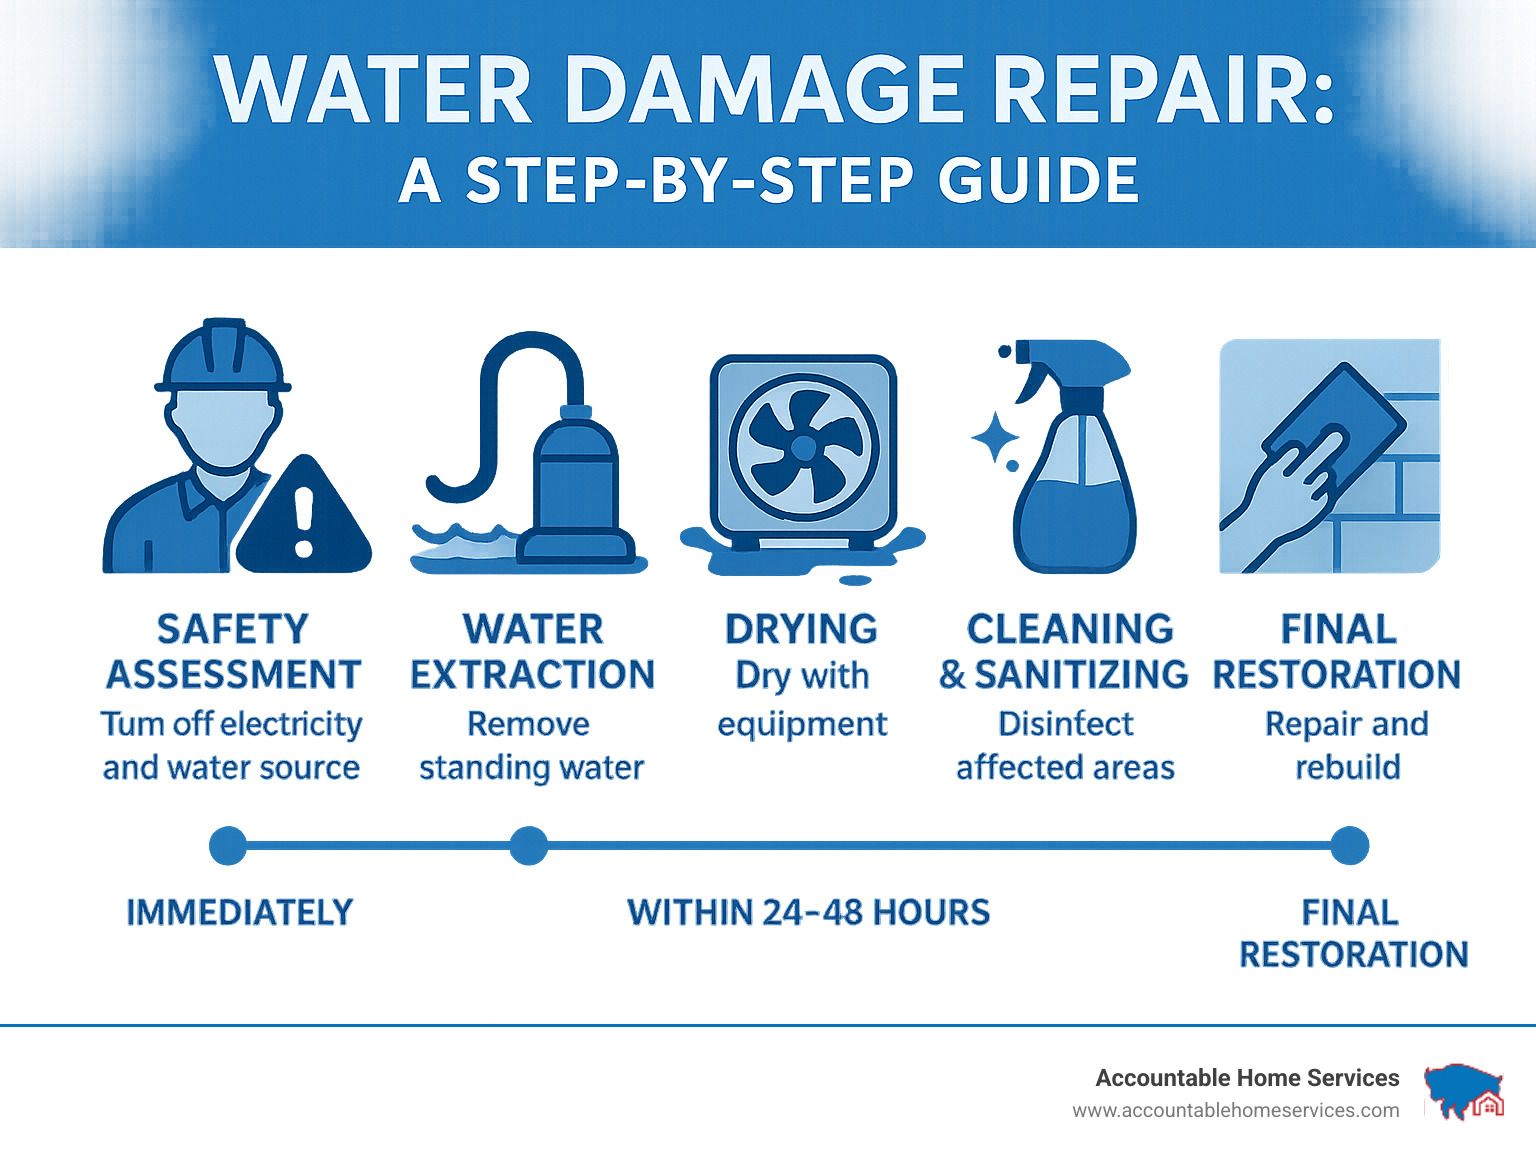
The water damage repair steps you take in those first crucial hours can make all the difference. Safety comes first – always turn off electricity to affected areas before wading into standing water. Next, assess the damage by identifying the water category. Is it clean water from a broken supply line? Gray water from appliances? Or black water from sewage backups? Each requires different handling approaches.
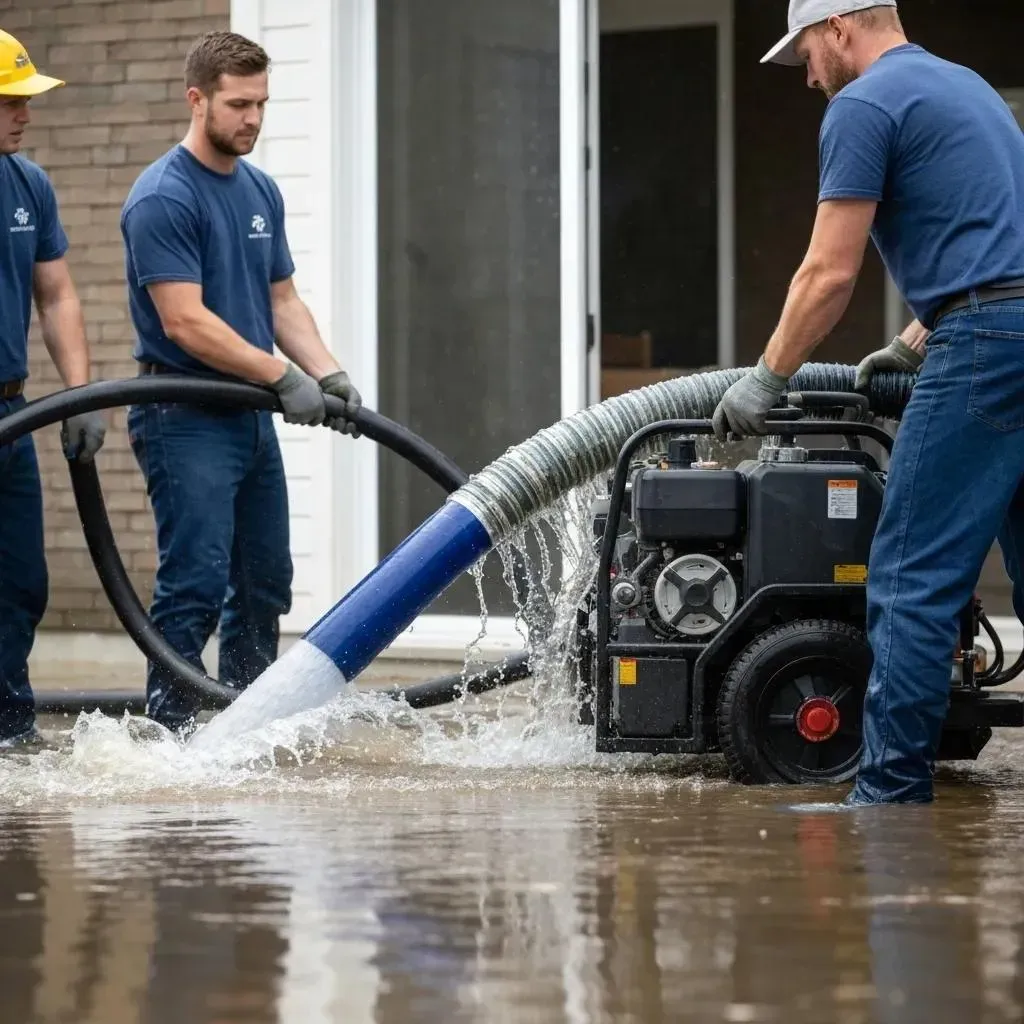
Documentation is crucial for insurance claims, so snap plenty of photos before you begin cleanup. Then it's time to remove standing water using pumps or wet vacuums. For extensive damage, calling professionals with industrial equipment can save precious time.
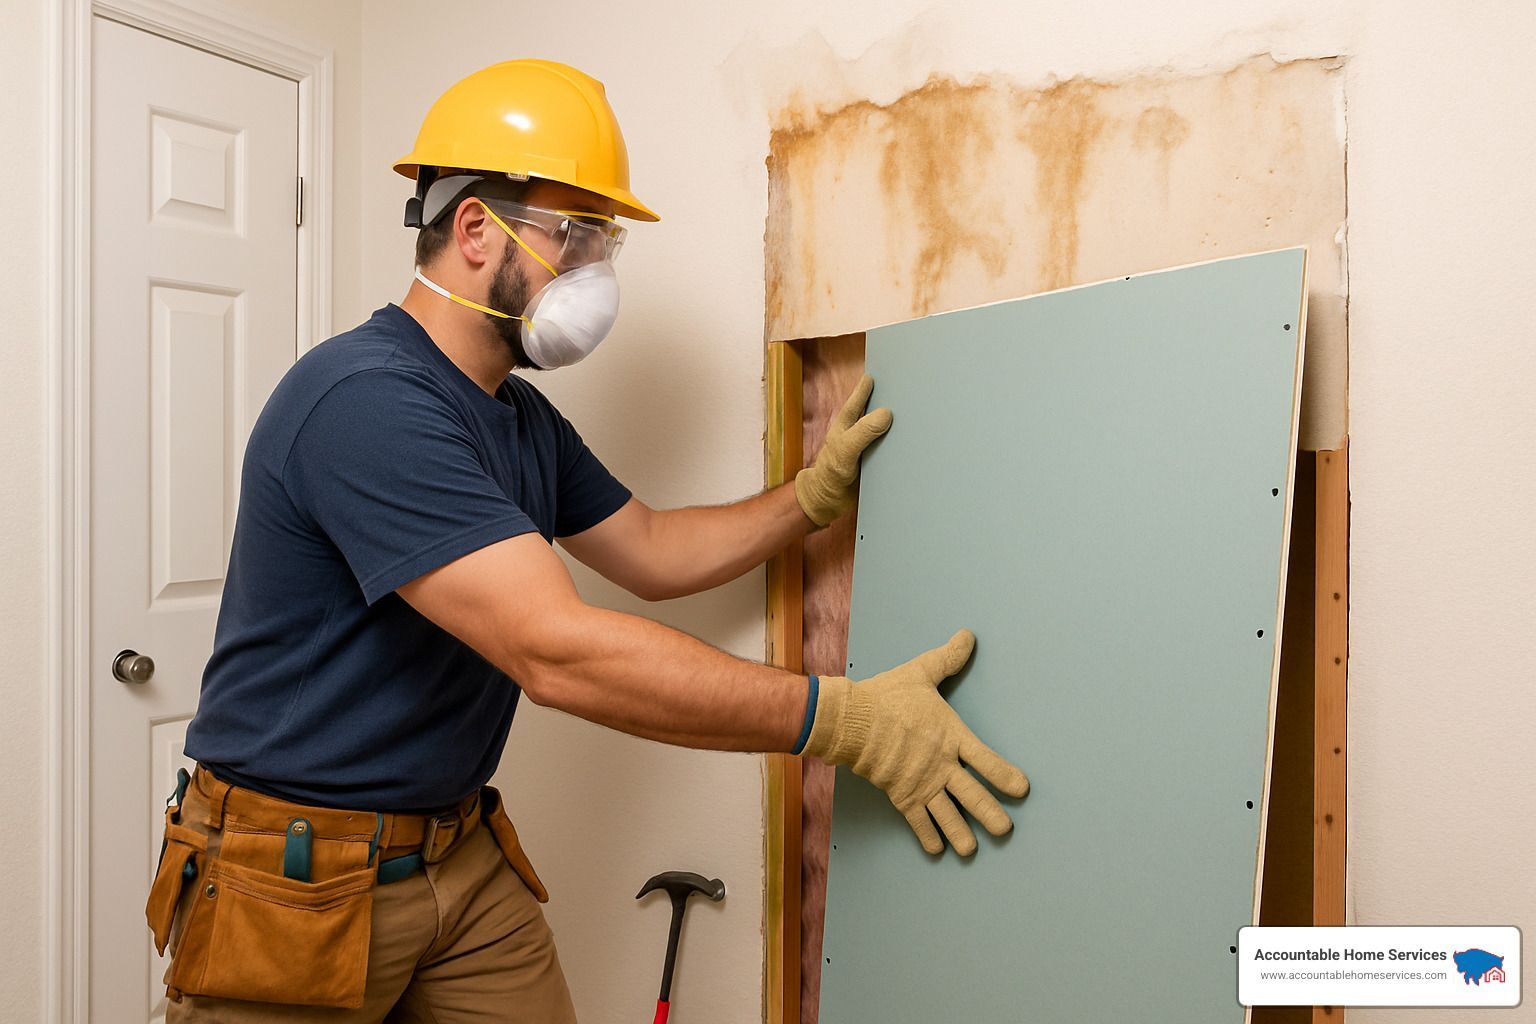
Once visible water is gone, thorough drying becomes your priority. Water damage repair steps must include proper dehumidification and air movement to prevent mold growth in hidden pockets. Cleaning and sanitizing all surfaces is essential, especially with gray or black water exposure. Materials that can't be salvaged – often including saturated drywall, carpeting, and insulation – should be removed and properly disposed of.
The final water damage repair steps involve repairing and restoring your home to its pre-damage condition, replacing drywall, flooring, and other damaged components. Our certified technicians work methodically through this entire process, responding 24/7 to minimize damage and safely restore your home.
While some small incidents might be manageable as DIY projects, significant water damage requires professional attention. The difference between quick recovery and long-term problems often comes down to how quickly and thoroughly those first water damage repair steps are implemented. When minutes count, having a trusted partner who understands the unique challenges of Denver homes can make all the difference.
Understanding Water Damage Basics
When water invades your Denver home, understanding what you're dealing with makes all the difference. Not all water damage is created equal, and knowing the specifics helps determine the right water damage repair steps for your situation.
Water damage falls into distinct categories and classes that professional restorers use to guide their approach. Think of it as a diagnosis before treatment—the more accurate the assessment, the more effective the solution.
Categories of Water Damage
That puddle in your basement might look harmless, but its source matters tremendously. Category 1 or "clean water" comes from broken water lines or overflowing tubs—initially safe but can degrade to Category 2 if left sitting for more than 24 hours.
Category 2 or "gray water" contains significant contamination from sources like washing machine overflow or toilet water without feces. This water might not look threatening, but it can cause illness if contacted or consumed.
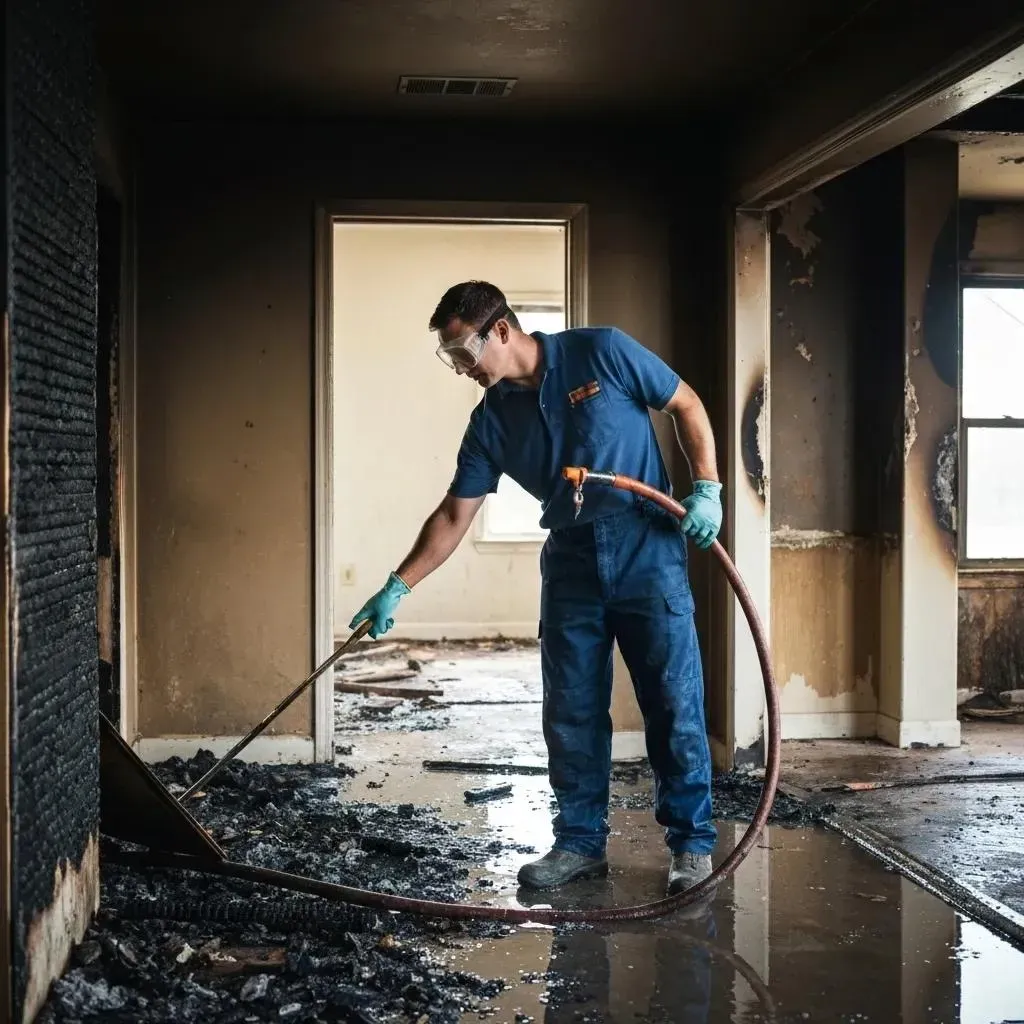
The most serious is Category 3 or "black water"—grossly contaminated water from sewage backups, river flooding, or long-standing water that's become a microbial playground. This requires professional handling with specialized equipment and thorough sanitization protocols.
Classes of Water Damage
While categories tell us about contamination levels, classes indicate how much moisture has been absorbed and how difficult drying will be:
Class 1 damage affects just part of a room with minimal absorption—think a small spill on tile flooring.
Class 2 involves an entire room with carpet and cushions affected, and water wicking up walls less than 24 inches.
Class 3 means the room is saturated from above—ceilings, walls, insulation, carpets, and subfloors are all wet and holding moisture.
Class 4 represents specialty drying challenges with materials like hardwood, concrete, or stone that have very low porosity but deep saturation pockets.
"The class and category directly impact how we approach restoration," explains our restoration manager. "A small amount of Category 3 water requires much more intensive work than a larger amount of Category 1 water, regardless of the visible damage."
Water Damage Repair Steps – Why Classification Matters
These classifications aren't just technical jargon—they directly affect the water damage repair steps needed to restore your home safely. With Category 1 clean water, many of your belongings and materials can be saved with proper drying techniques. But when Category 3 black water is involved, porous materials like carpet padding, drywall, and insulation typically need complete removal and replacement due to dangerous contamination.
"I've seen too many homeowners attempt DIY cleanup with Category 3 water, only to face serious health issues later," our lead technician shared. "Black water contains pathogens that require professional-grade disinfectants and proper protective equipment to handle safely."
Understanding these classifications helps you communicate more effectively with both insurance adjusters and restoration professionals. It ensures the right remediation approach for your specific situation, potentially saving time, money, and health complications down the road. The humidity in your home should ideally stay below 60% to prevent mold growth during and after the restoration process.
For more detailed information about how we handle different categories and classes of water damage, visit our Water Damage Restoration Process page.
Water Damage Repair Steps From Triage to Rebuild
When water invades your home, panic is a natural first response. But take a deep breath—having a systematic approach can make all the difference between a quick recovery and a prolonged nightmare. I've guided hundreds of Denver homeowners through these exact situations, and I'm here to walk you through the journey from crisis to comfort.
Water Damage Repair Steps – Immediate Actions (0-24 hrs)
Those first 24 hours are absolutely critical. I remember helping a family in Highlands Ranch last winter after a pipe burst while they were on vacation. When they returned to two inches of water throughout their main floor, they were overwhelmed. The first thing I told them was, "Let's focus on what we can control right now."
Stop the water source immediately. This might seem obvious, but in a panic, basics can be overlooked. Find your main water valve (usually in the basement or crawlspace) and turn it clockwise to shut it off. For roof leaks, strategic placement of buckets can buy you time while you arrange for professional help.
Turn off electricity to affected areas. Water and electricity are a dangerous combination. If your breaker box is in a dry location, shut off power to wet areas. If you can't safely reach it, please call an electrician—your safety comes first.
Before diving into cleanup, assess for safety hazards like sagging ceilings or warped floors. These could indicate structural compromise that might make the area unsafe to enter.
"I once had a client try to start cleanup without proper protection," shares our restoration team leader. "They ended up with a respiratory infection from the contaminants in the water. Don't make that mistake." Protect yourself with rubber boots, waterproof gloves, and an N95 mask, especially if you're dealing with anything other than clean water.
Before moving a single item, document everything thoroughly. Take clear photos and videos of all damaged areas and items. This documentation will be invaluable when filing your insurance claim. As our claims specialist often says, "The photos you take today will be worth their weight in gold tomorrow."
Contact your insurance company right away. Most policies require prompt reporting, and many have specific timelines for mitigation. Understand what's covered before making major decisions.
Finally, salvage valuable items by moving them to dry areas. A simple trick: place aluminum foil under furniture legs to prevent carpet staining and further damage.
Time is truly of the essence. For more detailed guidance on these critical first steps, visit our guide: Damaged by Water? 5 Urgent Steps to Take Now.
Water Damage Repair Steps – Drying & Dehumidifying (24-72 hrs)
Once you've addressed the immediate crisis, thorough drying becomes your primary focus. This is where many DIY efforts fall short, leading to long-term problems like mold and structural weakness.
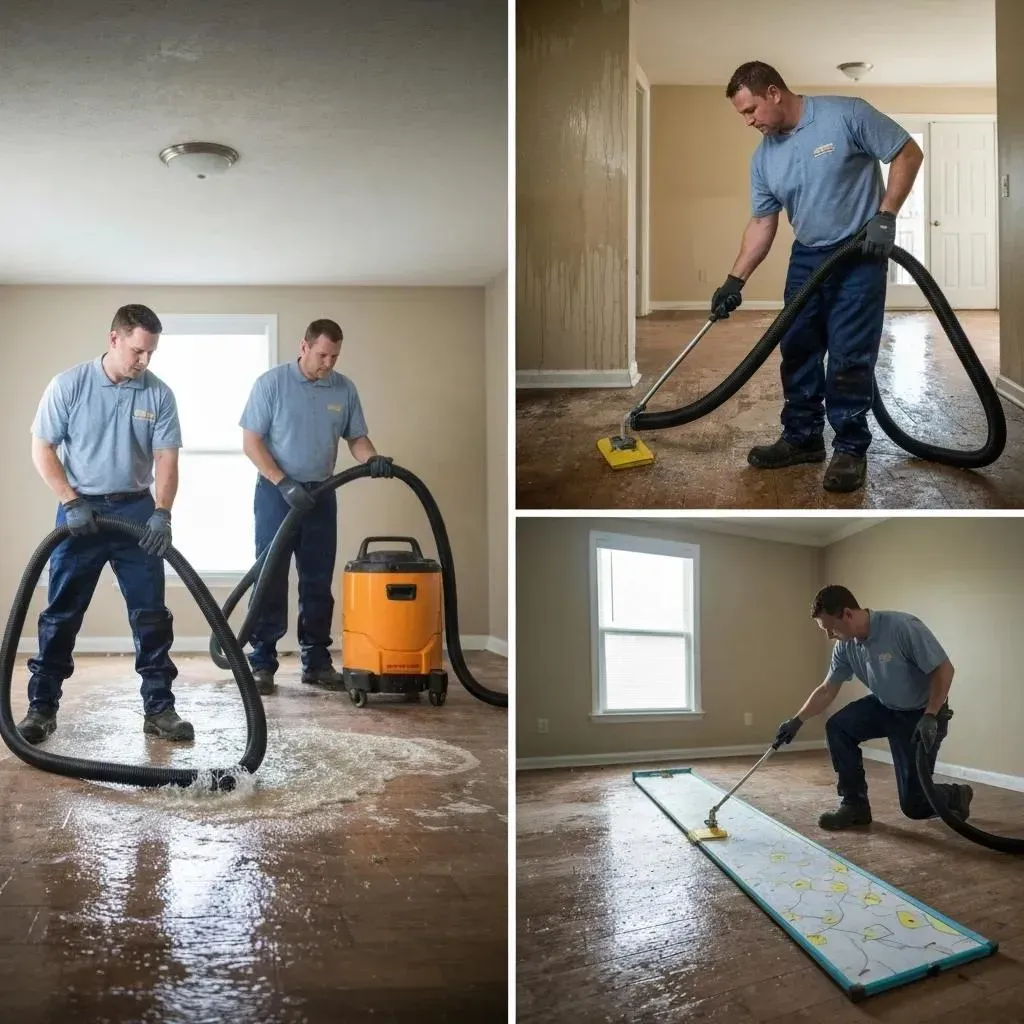
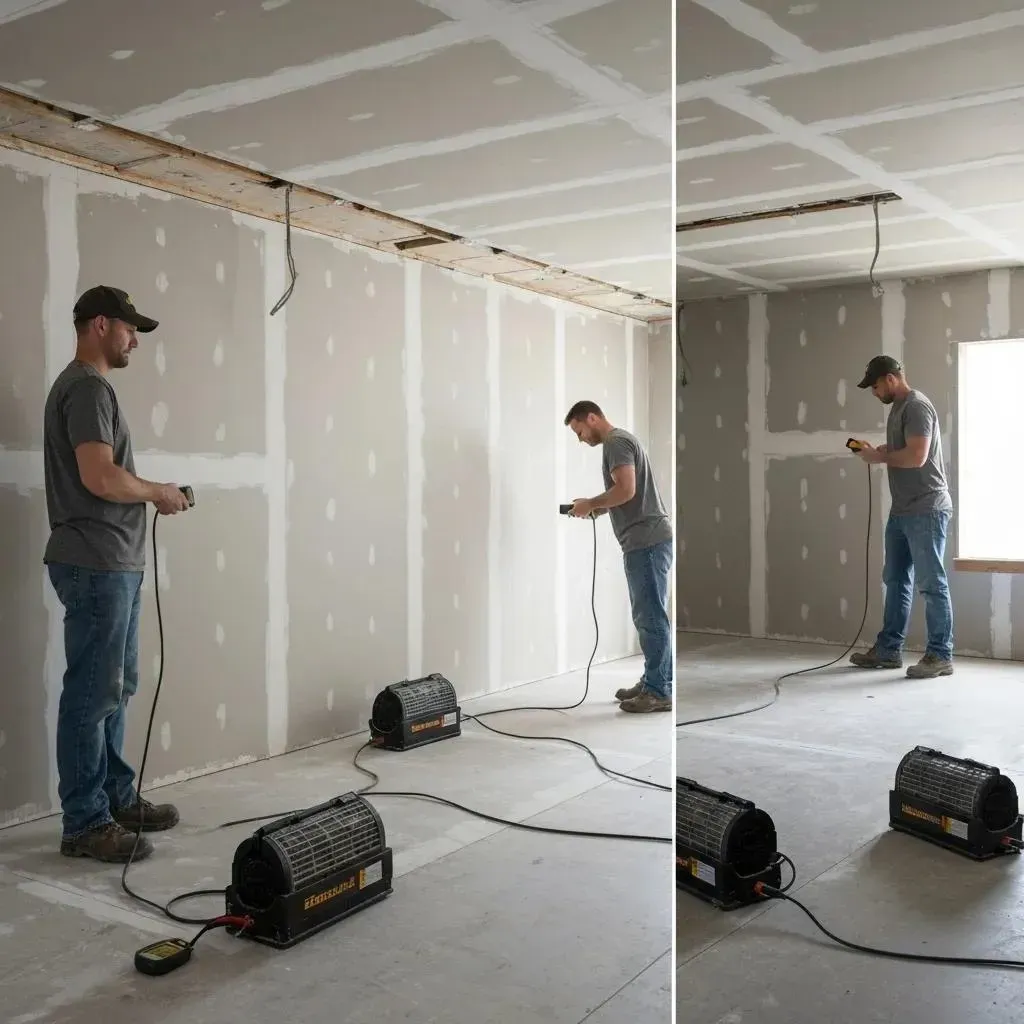
Effective water extraction is the foundation of proper drying. Consumer wet/dry vacs can handle small incidents, but for significant water intrusion, professional equipment makes a tremendous difference. Our truck-mounted extractors can remove hundreds of gallons per hour, dramatically speeding up the recovery process.
Some materials simply can't be saved. Removing saturated materials like carpet padding and heavily soaked drywall not only speeds up drying but also prevents mold growth in these highly absorbent materials.
Creating the right environment for drying is a science. Strategic equipment placement is crucial—it's not just about having fans and dehumidifiers, but positioning them to create a controlled airflow system that efficiently removes moisture. We position air movers to create a vortex effect that lifts moisture from surfaces, while dehumidifiers capture that airborne moisture.
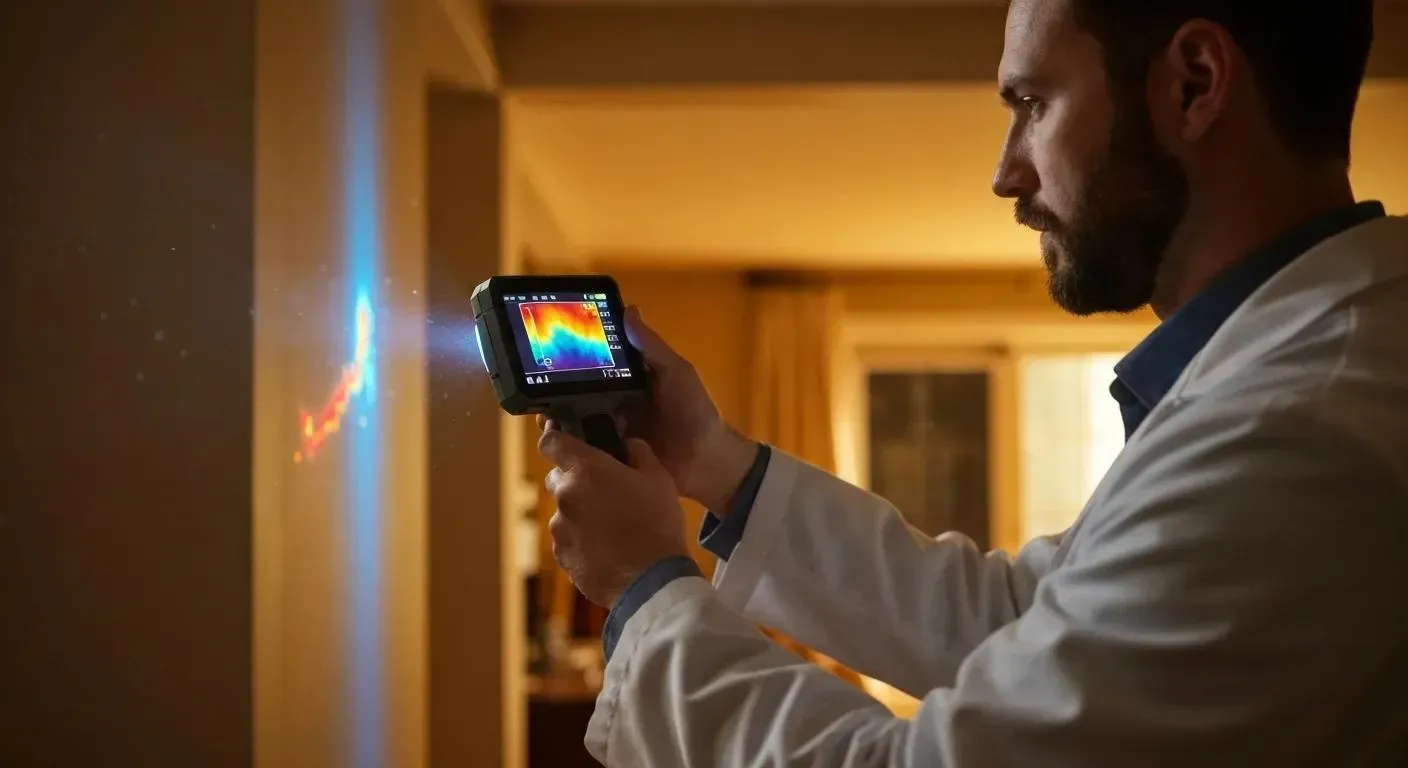
"What looks dry can be deceiving," explains our technical director. "I've seen countless situations where walls felt dry to the touch but contained dangerous levels of moisture within." This is why we use moisture meters and thermal imaging to detect hidden moisture pockets that the naked eye can't see.
For challenging materials like hardwood floors and concrete, we employ specialized drying techniques like floor mat systems that use negative pressure to pull moisture from deep within dense materials. A recent project in Cherry Creek saved a homeowner's original hardwood floors using exactly this method—avoiding thousands in replacement costs.
For emergency extraction services when minutes count, learn more about our rapid response capabilities at Emergency Water Extraction Services.
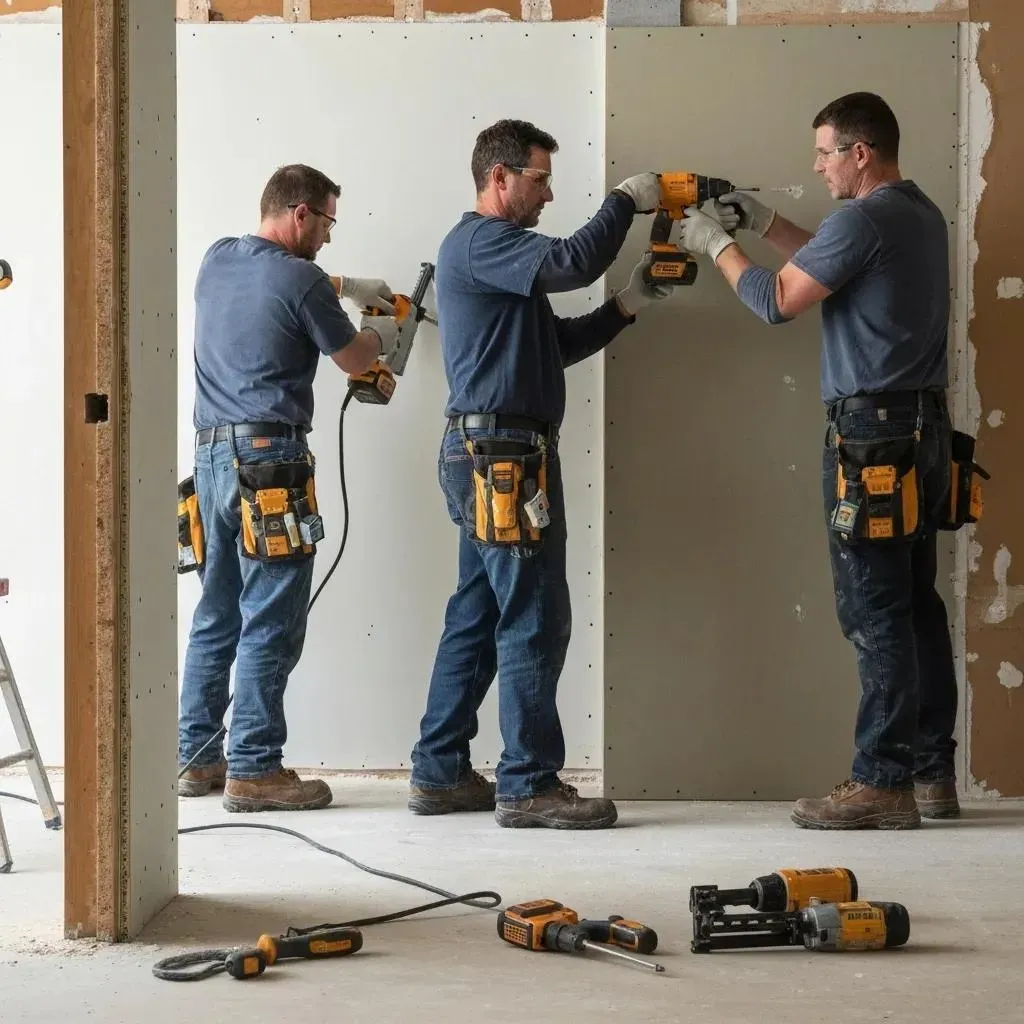
Step-by-Step Structural Repairs & Rebuild
Once we've won the battle against moisture, the rebuilding phase begins. This is where your home truly starts to feel like home again.
Before any cosmetic repairs, we assess structural integrity to ensure your home is safe. Water can compromise load-bearing elements in ways that aren't immediately obvious, so this professional evaluation is essential.
We always address ceiling damage first—gravity makes these repairs a priority to prevent collapse risks. When working with ceilings, we look beyond the obvious damage to identify potential roof leaks or plumbing issues that might have caused the initial problem.
For walls, we replace damaged drywall sections, cutting to the nearest stud and removing material at least 12 inches above the water line. In bathrooms and kitchens, we recommend moisture-resistant greenboard to prevent future issues.
Flooring often bears the brunt of water damage. Depending on the extent, we may repair or completely replace flooring. This is actually a great opportunity to consider upgrading to more water-resistant options like luxury vinyl plank flooring, which has saved many Denver homeowners from repeat disasters.
Wet insulation loses its thermal resistance and becomes a perfect breeding ground for mold, so replacement is almost always necessary. This is also an opportunity to upgrade to higher R-value insulation for better energy efficiency.
After addressing these structural elements, we move on to restoring cabinetry and trim work, which brings back the finished look of your home. We then apply mold-resistant primer and paint to further protect against future issues.
Before considering the job complete, we conduct a final moisture inspection to verify that all readings are within acceptable ranges. This gives you peace of mind that hidden moisture won't cause problems down the road.
A tip that's served many of our Denver clients well: Consider installing permeable pavement options for exterior areas prone to water pooling. This can significantly reduce urban flooding issues that often lead to basement water intrusion, especially in Denver's older neighborhoods where drainage systems may be outdated.
For more detailed information about water damage costs and professional restoration options, check out this latest research on water extraction costs.
Safety Precautions & Mold Mitigation
When it comes to water damage, what you can't see can often hurt you the most. I've been in countless homes where the visible damage was just the tip of the iceberg—hidden mold and contamination lurking behind walls posed the real threat to both the structure and the family's health.
Essential Safety Precautions
Water damage cleanup isn't something to take lightly. Before diving into any restoration work, safety must be your absolute priority. Never enter standing water where electrical outlets or appliances are submerged. I've seen homeowners make this dangerous mistake, risking electrocution because they were eager to salvage belongings. Always use circuit testers to verify power is completely off before stepping into wet areas.
Keep a watchful eye for structural warning signs like sagging ceilings, warped floors, or foundation cracks. These aren't just cosmetic issues—they could indicate serious collapse risks. I remember helping a family in Lakewood who ignored a water-damaged ceiling until it suddenly gave way, narrowly missing their child.
Proper protective equipment is non-negotiable, and the level you need depends on the water category:
"I can't stress enough the importance of proper protective equipment," says our safety coordinator. "We've seen too many homeowners develop respiratory issues after attempting DIY cleanup of contaminated water without adequate protection."
Good ventilation is crucial during cleanup, but be careful—when dealing with mold, you need to contain airflow to prevent spores from spreading to unaffected areas of your home. This balance between ventilation and containment is something many DIYers get wrong.
Mold Prevention and Remediation
The clock starts ticking the moment water touches your home materials. Within just 24 hours, mold can begin establishing colonies that will spread throughout your home via air ducts and natural air movement. Thorough drying within 48 hours is your best defense against a mold invasion.
"A common mistake we see is using bleach on porous surfaces like drywall," explains our mold remediation specialist. "Bleach's water content can actually feed mold growth in these materials while the chlorine remains on the surface, giving a false sense of security."
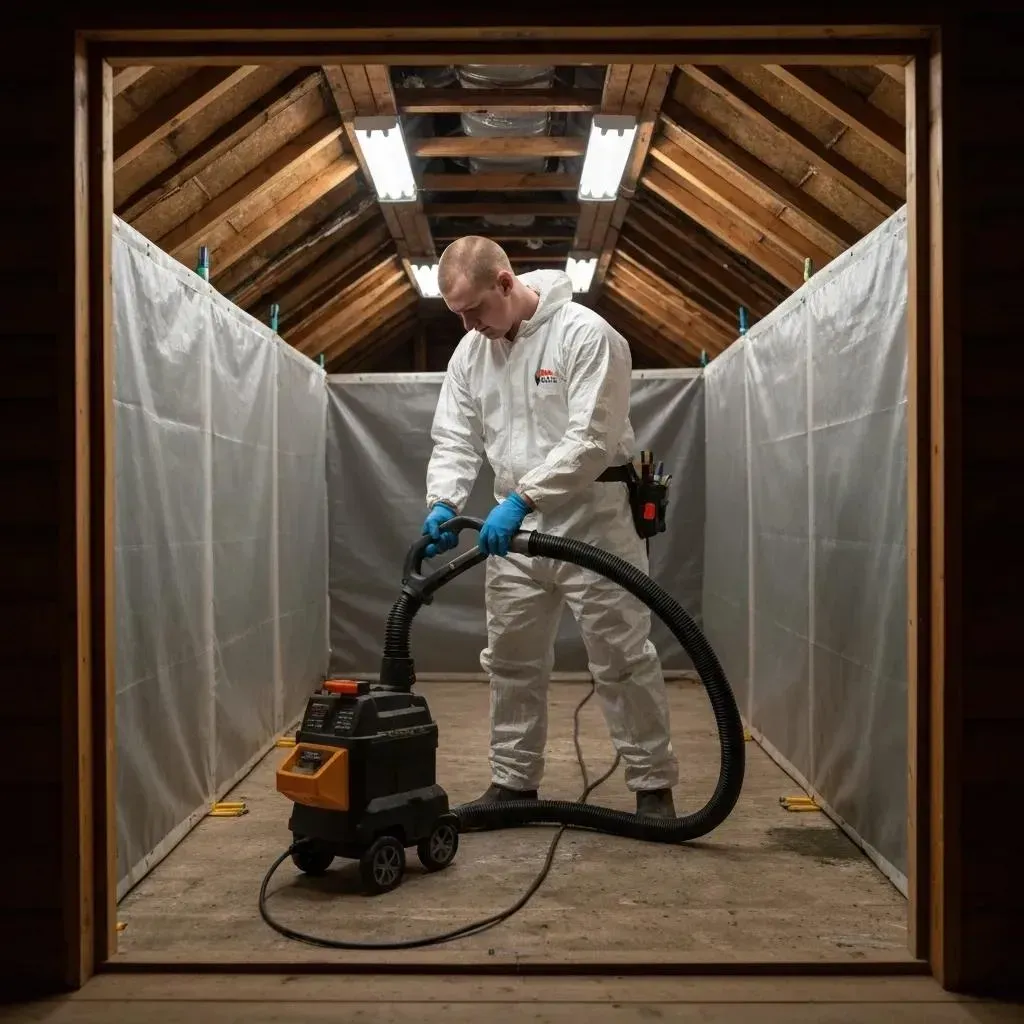
When tackling existing mold, proper containment using plastic sheeting and negative air pressure is essential. This prevents you from inadvertently turning a localized problem into a whole-house issue. HEPA air filtration during remediation captures airborne spores that would otherwise settle in new locations.
For salvageable materials, appropriate antimicrobial cleaning is crucial. While small areas (under 10 square feet) of non-porous surfaces might be manageable with a homemade solution of 1 cup bleach to 1 gallon of water, larger areas or porous materials generally require professional-grade products and expertise.
Unfortunately, porous materials showing visible mold typically need to be removed and replaced entirely. That favorite couch or cherished carpet pad might be a loss, but your family's health is worth the sacrifice.
For scientifically-backed approaches to mold cleanup, I always point homeowners to the EPA's mold cleanup guidelines, which offer reliable, research-based advice.
Hidden-Mold Hotspots & Testing
The most dangerous mold is often the mold you can't see. After responding to thousands of water damage repair steps in Denver homes, I've learned to look beyond the obvious.
Wall cavities frequently harbor hidden moisture, with water wicking up inside walls far beyond visible water lines. That's why cutting drywall at least 12 inches above the water line is standard practice. Subfloors beneath seemingly undamaged vinyl or tile flooring can be secretly harboring mold colonies.
Attic spaces are particularly problematic in Colorado's climate. The combination of roof leaks and condensation from temperature fluctuations creates perfect mold conditions in insulation and rafters. Kitchen and bathroom cabinetry conceals plumbing penetrations that allow hidden leaks to fester undetected for months.
Don't forget your HVAC system—ductwork can harbor mold that gets distributed throughout your entire home each time your system runs. I've seen families suffering persistent respiratory issues traced back to contaminated ductwork after minor water events they thought were fully resolved.
At Accountable Home Services, we rely on advanced detection tools rather than guesswork: thermal imaging cameras reveal temperature differences indicating moisture, while penetrating moisture meters help us find what's happening below the surface. Regular hygrometer readings track ambient humidity levels to ensure conditions won't support new mold growth.
"We recently helped a family in Westminster who couldn't understand their persistent respiratory issues," shares our remediation manager. "Using thermal imaging, we finded extensive hidden mold from long-term attic condensation that had been completely invisible to the naked eye."
For more comprehensive information on thorough inspection approaches, check out our detailed guide: Avoid Costly Repairs with These Water Damage Inspection Must-Dos.
Costs, Timelines, and When to Call Pros
Let's talk money and time—two things every homeowner worries about when dealing with water damage. I've seen the look of shock on homeowners' faces when they realize the true scope of restoration work needed, so let me walk you through what you can realistically expect.
Cost Expectations
Water damage isn't cheap, I'll be honest with you. The price tag varies wildly depending on several key factors. For clean water situations (like that overflowing bathtub), you're looking at about $3.75-$4.25 per square foot. But when you're dealing with the nasty stuff—black water from sewage backups or flooding—costs jump to $7.00-$7.50 per square foot because of the extensive sanitization required.
Most Denver homeowners end up paying somewhere between $1,200 and $5,000 for standard water damage restoration, with the average hovering around $3,000 for gray water situations. But these numbers can climb quickly when high-end materials are involved. That gorgeous hardwood floor or custom cabinetry? They'll cost significantly more to restore or replace than standard materials.
"I remember helping a family in Cherry Creek whose kitchen had beautiful custom maple cabinetry damaged by a dishwasher leak," says our restoration manager. "The materials alone added nearly $2,000 to their restoration costs compared to standard cabinets—something their insurance fortunately covered."
Ceiling repairs deserve special mention because they're particularly tricky. When water comes from above, expect to pay between $45-$55 per square foot for ceiling restoration—and that doesn't include fixing whatever caused the leak in the first place.
"One factor many homeowners overlook is the cost of temporary housing if the damage renders parts of your home uninhabitable," points out our customer service manager. "Check if your insurance policy includes Additional Living Expenses coverage, which can help with hotel and meal costs during extensive repairs."
Typical Timelines
Time is another crucial factor in water damage restoration. The process isn't something that happens overnight, especially for severe cases. Here's what a typical timeline looks like:
The water extraction phase usually takes 1-2 days, depending on how much water we're dealing with. Then comes the drying process—typically 2-5 days for standard situations but potentially stretching to several weeks for severe flooding or when dense materials like hardwood or concrete are involved.
Once everything's dry, demolition and cleaning generally takes another 1-2 days. The final reconstruction phase ranges from a quick 1-2 weeks for minor repairs to 4-8 weeks for extensive rebuilding projects.
"In Colorado's climate, we can sometimes expedite drying due to our naturally low humidity," notes our operations manager. "However, dense materials like hardwood floors and concrete can still take extended time to dry properly, even in our dry climate."
I've found that being upfront about timelines helps my clients plan accordingly. There's nothing worse than expecting your home to be back to normal in a week only to find it'll be a month-long process.
DIY vs Professional Restoration Decision Tree
I understand the temptation to handle water damage yourself—believe me, I do. As a homeowner myself, I've faced those middle-of-the-night emergencies where you're weighing the costs of calling in pros versus handling it yourself.
DIY can be appropriate when you're dealing with clean water in a small area (under 10 square feet), with no structural elements affected. You'll need to start drying immediately, ensure there are no electrical hazards, and have proper equipment like commercial dehumidifiers and air movers—not just your household fans.
On the flip side, professional help is absolutely essential when dealing with contaminated water (Category 2 or 3), when water has been standing for over 24 hours, or when large areas are affected. The same goes for situations involving structural damage, compromised electrical systems, visible mold growth, unknown water sources, or if you have health concerns or mobility limitations that might make DIY work unsafe.
"Trust me, I understand the desire to handle things yourself and save money," says our founder. "But I've seen too many DIY attempts turn into much larger, more expensive problems when homeowners underestimate the extent of damage or lack proper equipment."
I recently helped a homeowner in Lakewood who tried handling what seemed like a minor leak himself. Three weeks later, he called us in a panic when he finded extensive mold behind his walls—a problem that cost three times more to fix than if he'd called us initially.
For more guidance on what to expect when working with restoration professionals, visit What to Expect When You Call a Water Damage Restoration Expert.
Water damage repair steps should always prioritize your safety and long-term home integrity. Sometimes the most cost-effective solution is bringing in professionals from the start—especially when dealing with anything beyond the most minor water incidents.
Insurance Documentation & Future Prevention
When water damage strikes, having the right insurance coverage and preventive measures can save you thousands of dollars and countless headaches. Let me walk you through how to steer insurance claims and protect your home from future water disasters.
Insurance Documentation Best Practices
That moment when you find water damage can feel overwhelming, but clear documentation is your best ally in the insurance process. Start by contacting your insurance company immediately—many policies actually require reporting within 24-48 hours of finding damage.
"I always tell my clients to think like a detective," says our claims specialist. "The more evidence you gather, the stronger your case will be with insurance adjusters."
Before touching anything, grab your phone and capture the scene. Take detailed photos and videos of every affected area from multiple angles. Document not just obvious damage but also water height marks on walls and furniture. This visual timeline—before, during, and after restoration—proves invaluable when adjusters review your claim.
Next, create a comprehensive inventory of damaged belongings. Include detailed descriptions, approximate purchase dates, estimated values, and model numbers where applicable. For higher-value items, try to locate original receipts or credit card statements that verify purchase prices.
Keep every receipt related to your water damage—from emergency plumber calls to hotel stays if you've been displaced. These expenses often qualify for reimbursement under your policy.
Understanding your coverage type is crucial. Standard homeowners insurance typically covers sudden, accidental water damage like burst pipes or appliance failures, but excludes external flooding. If your damage resulted from rising waters or ground seepage, you'll need separate National Flood Insurance Program (NFIP) coverage—something many Denver homeowners overlook until it's too late.
Preventing Repeat Water Disasters
After experiencing water damage firsthand, most homeowners become highly motivated to prevent future incidents. Smart prevention starts with understanding your home's vulnerabilities.
Modern technology offers excellent first-line defense options. Water detection devices have become remarkably affordable and effective—place these smart sensors near washing machines, water heaters, toilets, and under sinks to receive instant alerts on your smartphone when moisture is detected. Some advanced systems can even automatically shut off your home's main water supply when leaks are detected.
Routine plumbing maintenance pays dividends in prevention. Schedule annual inspections to identify potential issues before they become emergencies. Replace washing machine hoses every 3-5 years with stainless steel-braided alternatives that resist bursting. Check toilet flappers and valve seals regularly—these inexpensive parts are common culprits in slow, damaging leaks.
Foundation protection is essential in Denver's variable climate. Ensure your yard slopes away from your foundation at a grade of at least 1 inch per foot for the first 6-10 feet. Keep gutters clean and extend downspouts at least 5 feet from your foundation—farther if possible. Consider installing permeable pavement in areas prone to pooling, which allows water to drain through rather than run toward your home.
For homes with basements, a quality sump pump with battery backup provides crucial protection during heavy rains or spring snowmelt. Test your pump regularly, especially before our mountain snowpack begins melting in spring.
"One of our clients in Boulder installed water sensors throughout their home after a significant water damage event," shares our preventive specialist. "Just three months later, they received an alert about a slow leak under their kitchen sink that would have caused major damage if undetected."
For comprehensive guidance on handling water emergencies in our region, see our guide: How to Handle Emergency Water Damage in Denver: A Complete Guide.
Preventing Repeat Water Disasters
Colorado's unique climate creates specific challenges for homeowners. Our dramatic temperature swings—sometimes 40+ degrees in a single day—put enormous stress on plumbing systems. Winter pipe protection becomes essential, especially for pipes in unheated spaces like garages, crawl spaces, and exterior walls. Insulate these vulnerable pipes and disconnect outdoor hoses before winter arrives.
Snow and ice dam management deserves special attention in Denver. Our intense winter sun can rapidly melt roof snow, which refreezes at eaves, creating damaging ice dams. Proper attic insulation and ventilation maintain even roof temperatures, preventing these dangerous formations.
Don't overlook your sprinkler system maintenance. Have irrigation systems professionally winterized each fall and inspected every spring before reactivation. A single cracked pipe near your foundation can saturate soil and lead to basement seepage.
Your HVAC system requires attention too. High-efficiency furnaces and air conditioners produce significant condensation. Clean condensate drain lines annually with vinegar or specialized cleaning solutions to prevent clogs and overflows that can damage ceilings and walls.
Smart home integration represents the cutting edge of water damage prevention. Beyond simple sensors, complete systems can monitor water pressure, detect unusual flow patterns indicating leaks, and automatically shut off your water supply—providing protection even when you're away on vacation.
"We've seen a dramatic reduction in repeat water damage claims among clients who implement comprehensive prevention strategies," notes our prevention specialist. "The investment in prevention is minimal compared to the cost and disruption of water damage restoration."
For homeowners who've experienced water damage, these water damage repair steps can seem overwhelming. At Accountable Home Services, we not only restore your home but also help you implement effective prevention strategies custom to your specific property and Denver's unique climate challenges.
Frequently Asked Questions about Water Damage Repair
How long does the entire repair process take?
When dealing with water damage, one of the first questions homeowners ask is about timing. The truth is, there's no one-size-fits-all answer since every situation is unique.
For minor incidents like a small pipe leak caught early, you might see complete restoration in just 3-5 days. However, major flooding situations can stretch the timeline to 4-8 weeks from start to finish. Our team at Accountable Home Services understands how disruptive water damage can be to your daily life, which is why we're always transparent about timelines.
"We always provide clients with a detailed timeline during our initial assessment," explains our project manager. "We understand how disruptive water damage can be to your life, so we work efficiently while ensuring quality results."
Several factors influence how long your specific restoration might take:
Material density plays a significant role – porous materials like drywall dry relatively quickly, while hardwood floors and concrete might need extended drying time, especially in Colorado's variable climate.
Rebuilding complexity affects the timeline too. Simple drywall replacement might be completed quickly, but restoring custom features or historical elements in Denver's older homes requires more time and care.
Local permitting requirements can sometimes extend timelines, particularly for structural repairs that require official approval from Denver building authorities.
Does homeowners insurance cover every type of water damage?
This is perhaps the most misunderstood aspect of water damage – what's covered and what isn't. The short answer is no, not all water damage is treated equally by insurance companies.
Most standard homeowners policies will cover sudden, accidental water damage from events like burst pipes, washing machine failures, or roof leaks during storms. However, they typically exclude damage from gradual leaks, ongoing maintenance issues, or flooding from external sources like rivers or heavy rainfall.
"We recommend reviewing your policy annually and considering additional coverage based on your home's specific risks," advises our insurance specialist. "For example, homes near Cherry Creek or the South Platte River might benefit from flood insurance, even if not in a designated flood zone."
If you're concerned about flooding, you'll need separate coverage through the National Flood Insurance Program. It's also worth noting that many policies have specific limits for mold remediation resulting from water damage, which can be problematic in Denver's climate where hidden moisture can quickly lead to mold growth.
At Accountable Home Services, we've helped countless Denver homeowners steer the sometimes confusing world of insurance claims. We can work directly with your insurance company to ensure you receive the maximum coverage available under your policy.
Can I stay in my house during drying and repairs?
Whether you can remain in your home during the restoration process depends on several important factors that affect both comfort and safety.
For minor, localized damage – like a small leak under a bathroom sink – you can typically occupy other areas of your home while repairs are underway. We'll create containment zones to minimize disruption to your daily routine.
However, when dealing with Category 2 or 3 water damage (gray or black water), temporary relocation is often necessary due to potential health hazards from contamination. Similarly, if electrical systems have been compromised, staying in the home may not be safe until proper repairs are completed.
The practical aspects of restoration can also make staying difficult. Industrial drying equipment runs continuously (often 24/7) and generates significant noise that many find disruptive, especially for sleeping. Additionally, the air quality during demolition and restoration can be compromised by dust and airborne particles.
"We work with clients to create containment areas when possible, allowing partial occupancy during restoration," notes our project coordinator. "However, for extensive damage or contaminated water, temporary relocation is often the safest option."
If you do need to temporarily relocate, check your insurance policy for Additional Living Expenses coverage, which may help with hotel and meal costs during the restoration period. Our team can help you understand what your specific policy covers and assist with documenting expenses for your claim.
While the inconvenience of temporary relocation is frustrating, the water damage repair steps must be completed thoroughly to ensure your home is safe and healthy for the long term. Rushing the process to minimize displacement often leads to incomplete drying and subsequent mold issues that prove far more disruptive down the road.
Conclusion

When the waters recede and the fans fall silent, you're left with the relief of a home restored to safety. Following the right water damage repair steps isn't just about fixing what's broken—it's about reclaiming your peace of mind.
I've seen how water damage can turn a family's world upside down. That sudden pipe burst at 2 AM. The washing machine that flooded while you were at work. The roof leak during that unexpected Denver spring storm. Each scenario brings its own challenges, but the path to recovery follows the same essential roadmap we've outlined together.
At Accountable Home Services, we're not just restoring homes—we're helping families get back to normal. Our team of certified technicians stands ready 24/7 to respond to water emergencies throughout the Denver Metro Area. Whether you're in Broomfield watching water seep through your ceiling or finding a flooded basement in Westminster, we'll be there quickly with the right equipment and expertise.
What makes us different? We handle everything from start to finish. From that first emergency call through the final coat of paint, our team manages each step of the restoration process. We work directly with your insurance company, handling the paperwork and negotiations so you can focus on your family. No juggling multiple contractors or wondering what happens next—just a straightforward path back to normal.
The technology we bring to your home goes beyond standard equipment. Our advanced moisture meters detect dampness invisible to the naked eye. Our commercial-grade dehumidifiers pull moisture from materials faster than consumer units ever could. And our experienced technicians know exactly where water hides and how to eliminate it completely.
Don't let water damage linger—each hour that passes increases the risk of mold growth and structural problems. For emergency response or to learn more about protecting your home, visit our water damage restoration page or call our 24/7 emergency line.
In water damage, quick action today means fewer problems tomorrow. Your home deserves nothing less than complete, professional restoration—and your family deserves to return to a safe, dry home as soon as possible.